Welcome to Setpad! An online application that simplifies your life in production and that will help you fill in and calculate your timesheets simply and efficiently.
The steps to start your production
- Create your access
- Create a new production
- Enter the information in the Project Management tab
- Choose my plan (Independent, Premium, Pro)
- Naming collaborators and permissions (Plan Pro)
- Create or import a Functions Chart in the Crew List tab
- Enter production dates in the Production Schedule tab
- Starting contracts
Create your access
Since Setpad is an online application, the first thing to do is to create a username (email) and password by going to setpad.ca
If you received an invitation from the production to join a project in Setpad, just follow the invitation link and select your project by clicking on “Create or choose a production”
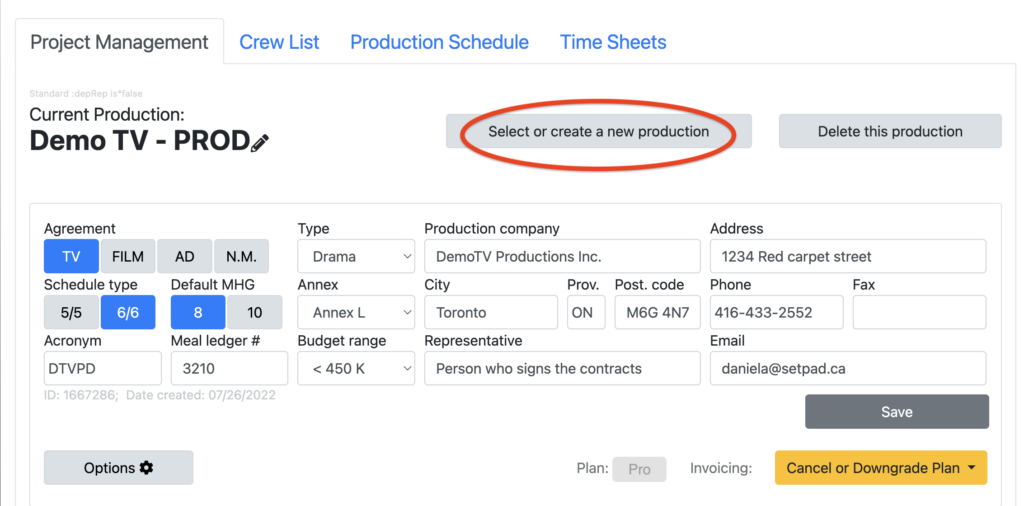
Creating a new production
If you need to create a new project in Setpad, first make sure you log in with the correct user/email account and click on “Create or choose a production”
There are more than a dozen collective agreements included in Setpad for AQTIS, CQGCR (DGC) and non-unionized members, be sure to choose the one that’s right for you. Then fill in the boxes relating to the production address (invoice address) and then save.
The “acronym” are the initials of the project’s name.
The “meal ledger #” is the code for the caterer if it is taxable.
The “Representative” is the person who signs the contracts and their email address.
Choosing my plan
There are three plans for using Setpad
- Indie plan (free mode, single user, up to 10 contracts)
- Premium plan (solo mode, single user, unlimited contracts/timesheets)
- Pro Plan (collaborative mode, multiple users at the same time, unlimited contracts/timesheets)
To apply the plan to your project, you must first create your project in Setpad. Then contact us at support@setpad.ca or your trainer to obtain a validation code/coupon. Once the code is obtained, click “Go Premium or Pro” in the Project Management tab. You will be directed to Prices and Options. Choose your plan and make sure your selected project is the correct one, then click on “Choose this plan”. A field to enter your validation code/coupon will appear by clicking on the Setpad logo.
Naming your collaborators and responsibilities
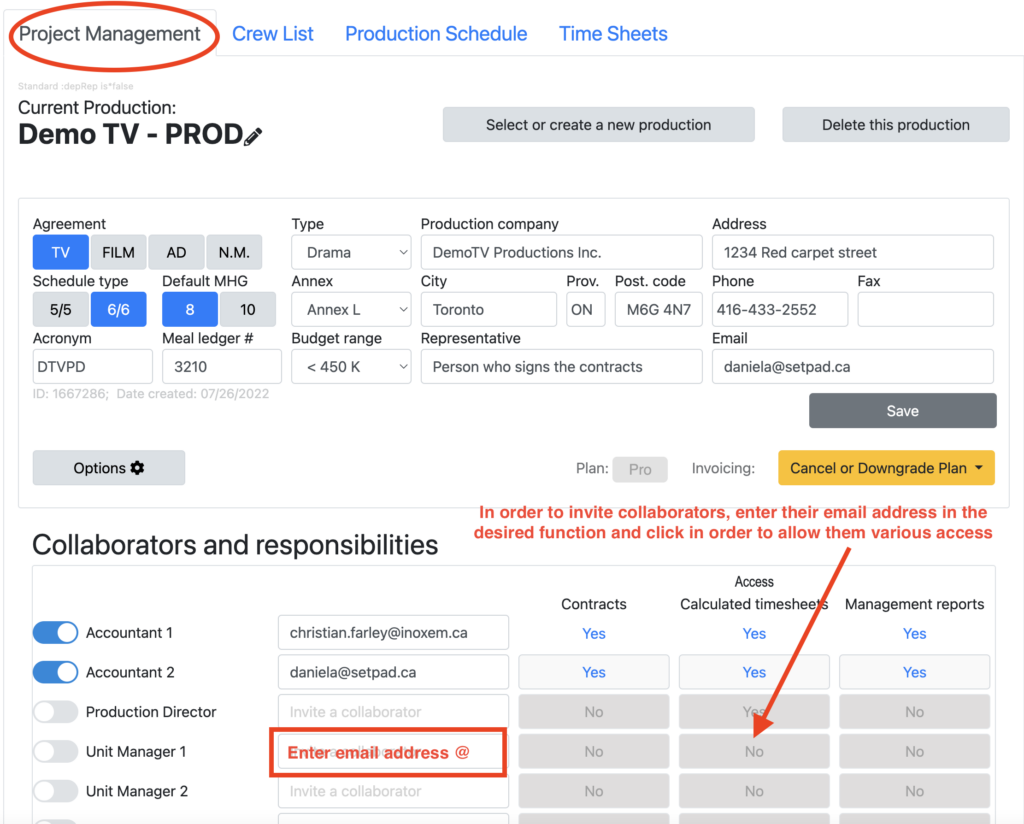
The Pro plan offers collaborative use of the application. This allows multiple users to work in the app at the same time. For example, coordination could enter contracts, while logistics enters set hours, production management approves timesheets using Setpad and accounting refers to them to produce payroll.
You can name up to 10 collaborators in Setpad and, for each one, give them different accesses or permissions. The person who starts the project, as well as accountants and production management can invite employees and grant them access. That is to say: who can see the financial information in the contracts, who can see the calculated time sheets and this for all the teams, only on set or only off set.
Create or import your functions chart
When starting your project in Setpad, it is mandatory to enter a functions chart. These are the accounting codes for each function of the departments.
Setpad gives you three choices:
- Copy the chart from a template (the generic Telefilm chart which contains more than 300 functions)
- Copy a chart from an existing production (ideal when doing several projects with Setpad and want to keep the same chart from one production to another)
- Start from an empty chart (ideal when you want to create your own chart and then copy it to your next projects in Setpad)
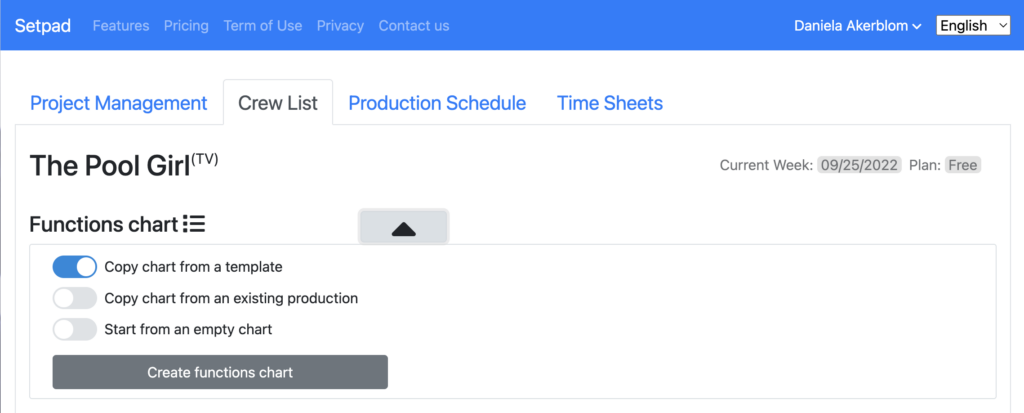
Each of the charts can be modified according to needs. You can also include MHRs (minimum hourly rate) or MDRs (minimum daily rate)
Enter the main dates of your production
In order to produce timesheets, you must first go to the Production Schedule tab and enter the main production start dates, the first Sunday of preparation, the first and last day of shooting and the approximate end date of your project.
You can also enter a “Normal week” for the set (if for example you shoot only 4 days a week or from Sunday to Thursday), as well as for the Sets, Costumes and Production departments off set. Otherwise, leave it Monday through Friday.
You can also automate hours to speed up the entry of hours for the off-set crew timesheets for the Sets, Costumes, or Production departments in the “Normal Day” section. All times entered in this section are general and can be changed individually in technician timesheets.
Once this information is entered, click on “Create production schedule”
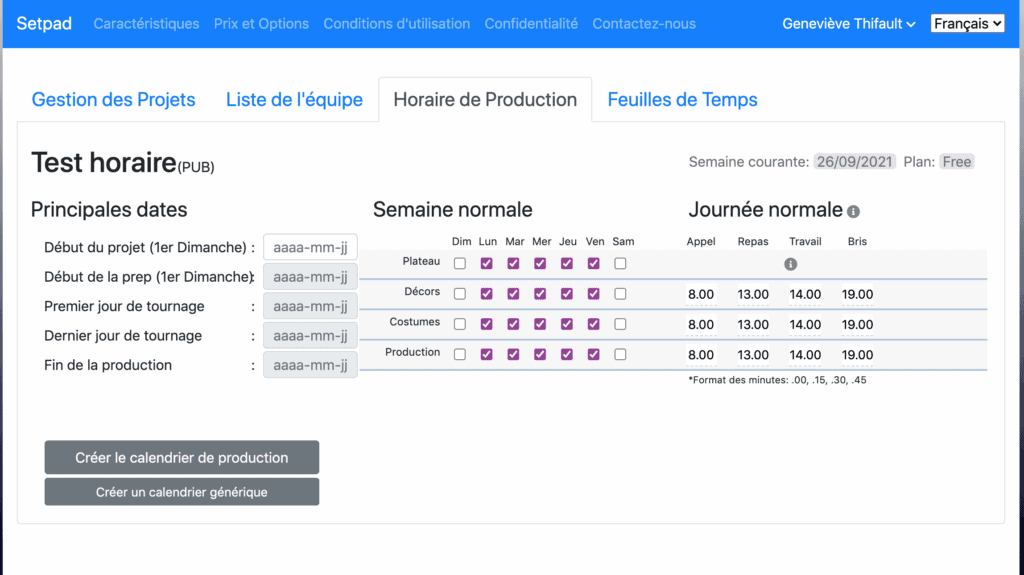
Setpad will create a Calendar and Set Schedule. This schedule is weekly.
In the Calendar and Set Schedule you will see that prep days have a ‘P’, shoot days are numbered and wrap days have a ‘W’.
You can extend the week by simply clicking on the “+” next to the date (first Sunday of the week) of each week.
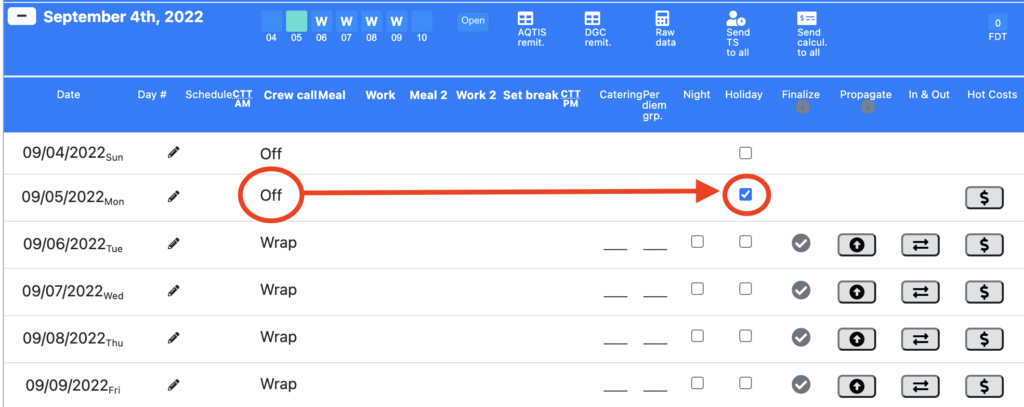
***It is important to indicate, as soon as the schedule is created, the statutory holidays so that Setpad can make the appropriate calculations. ***
Adding weeks to the production schedule
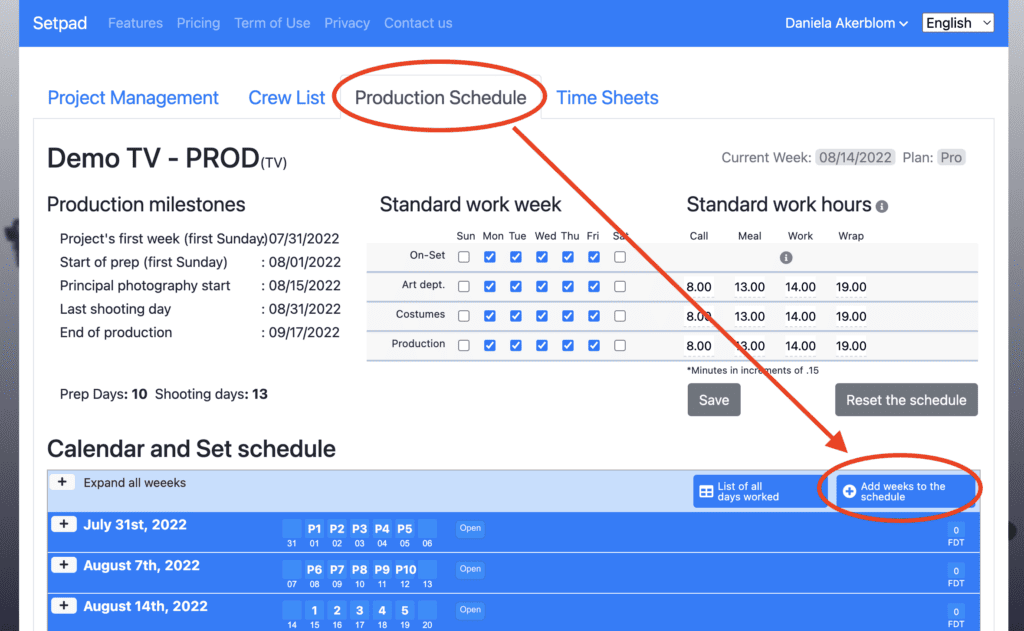
You can always add weeks to the schedule at the start or at the end by clicking “Add weeks to schedule”.
For timesheets exceeding the weeks scheduled in the production Calendar and Set schedule, here is how to do it:
If you have reached the number of days initially planned for your Calendar and Set schedule and you wish to enter hours for additional weeks, you must first enter these new weeks in the schedule (always by clicking on “Add weeks to the schedule”) before entering employee hours.
Starting contracts
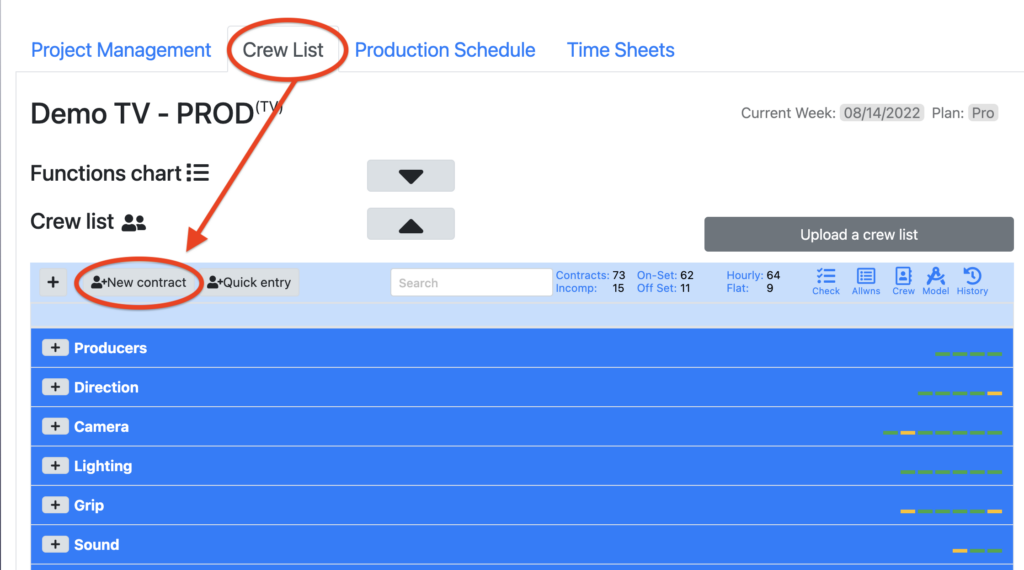
You are now ready to enter your contracts into Setpad. Go to the “Crew List” tab and click on “New Contract”. It is necessary to fill in the boxes of the “personal information”part and continuing with all the details of the contract.
You should know that Setpad works “by contract” which means that the application calculates according to the terms of one contract at a time. So, if you have terms of engagement or you have negotiated different agreements, for example in “preparation” different from those in “filming”, you will have to make two contracts in Setpad. A “preparation” contract and a “shooting” contract.
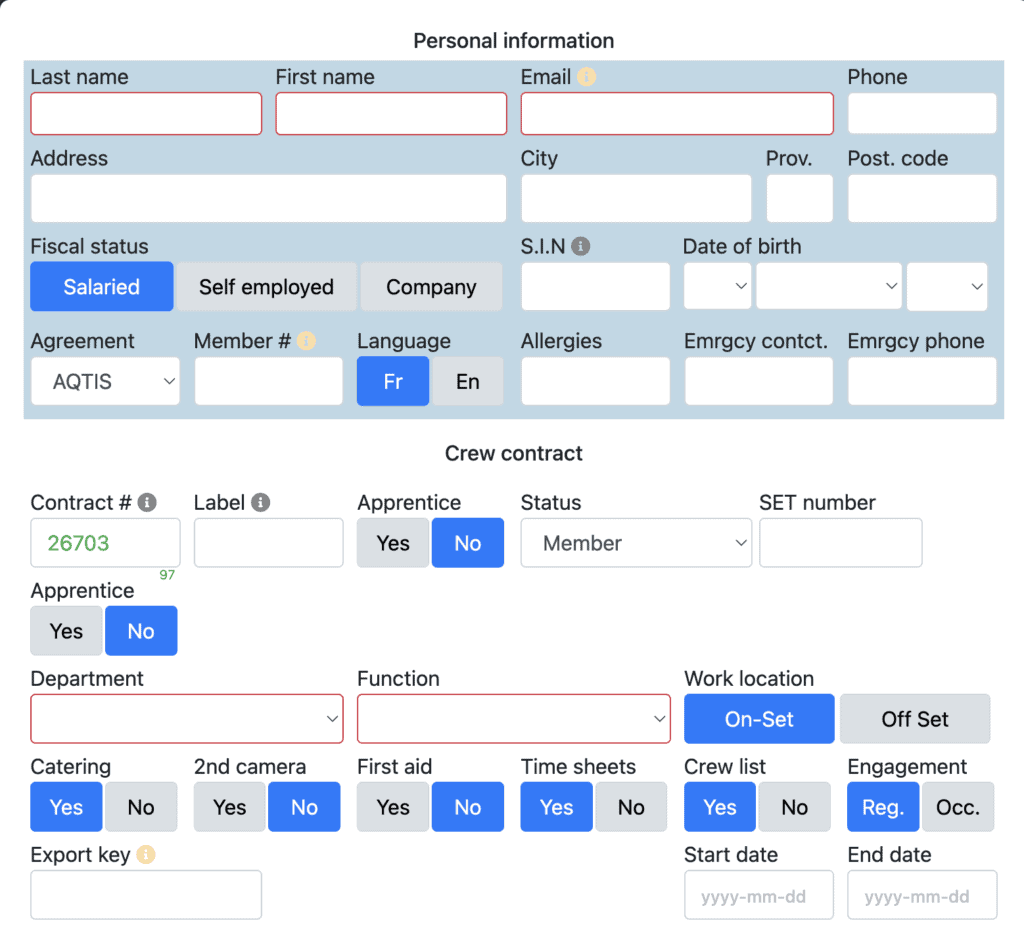
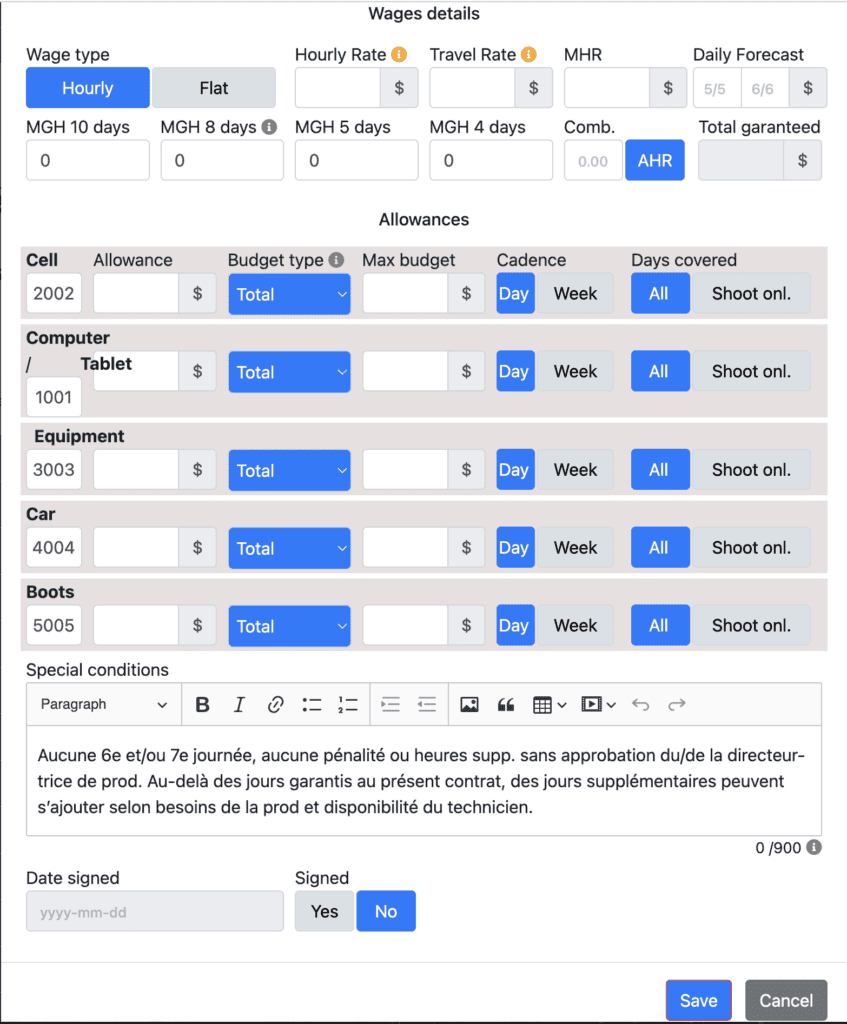
The boxes in red are mandatory in order to create a contract.
The small flashing “i”s indicate the boxes to be filled in for the contract to be “complete”. Once the contract is complete, Setpad has all the elements to correctly calculate timesheets.
Vous pouvez entrer une série de numéros de contrats dans les «Options» du projet, ils seront affichés en vert dans le champs #contrat. Le petit chiffre vert en bas à droite de la case indique le nombre de contrats restant dans votre série.
Tools and indicators for contracts
Several tools exist in the Crew list tab to allow you to follow up on your contracts and timesheets: Check (verification of data entered in the contract), Allwns (Allocation follow-up), Crew (Crew list and generate contracts for the whole team), Model (set cost model), History (history of timesheets sent via Setpad for each technician).
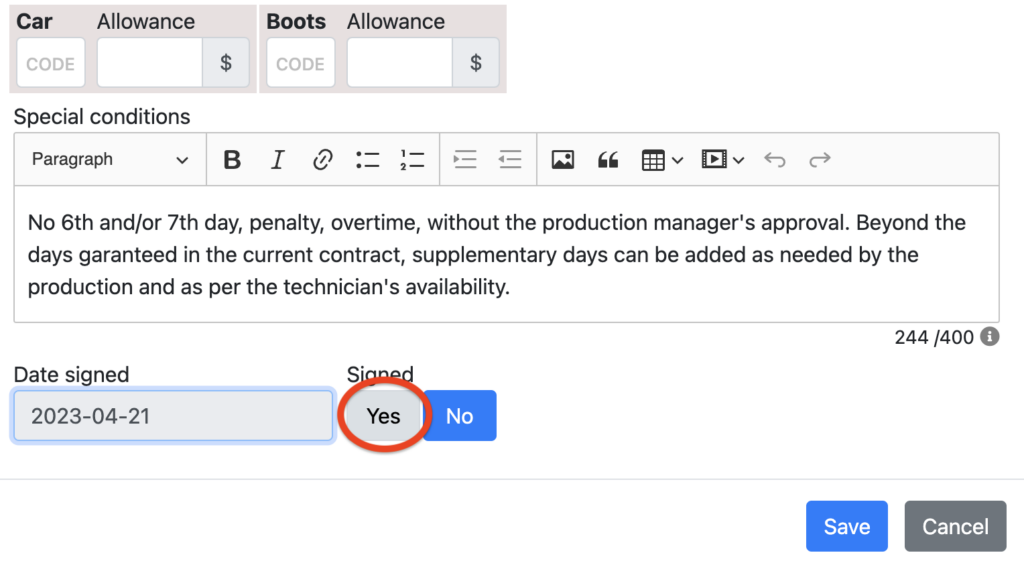
You can indicate which contracts have been signed directly at the bottom of the technical sheet. Contracts that will be indicated as signed will appear in green and will be easily visible in the application. You can also change the default Special Conditions field in the project options.
Generate an amendment to the contract
Using a pre-established template, you can write your amendment terms in the field provided for this purpose in the technician’s file. A small “A” will appear next to the contract icon in the Team List, and by clicking on it, you can generate the PDF document.